How to configure VPN for Windows 7 and Windows 8 [ext]
Manually configure a PPTP connection
1. Open Notepad and save an empty file, ideally on your desktop
2. Right-click on the file, select ‘rename’ and change the file extension from .txt to .pbk
You’ll see a warning – click ‘Yes’, then the file’s icon should change
3. Double click on your new .pbk file to open it. You’ll see a message: “The phonebook is empty…” – click ‘OK’
4. “Set up a new connection”: select ‘Workplace network’
5. 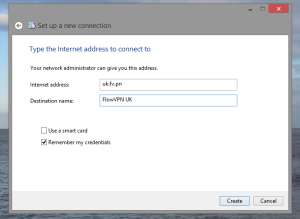 Populate ‘server name’ with your choice of Flow VPN server addresses – see list below.
Connection name can be anything, ‘FlowVPN’ is fine. Click ‘Create’
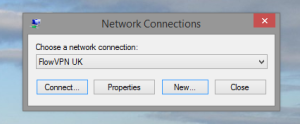 6. You’ll see the Network Connections window. Click ‘Connect…’
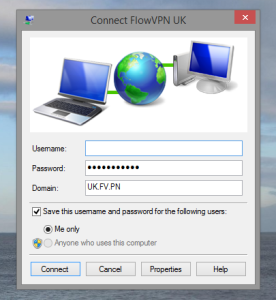 7. Enter your username and password – for Flow VPN subscribers your username will be your email address. If this is the first time you’ve connected you’ll have received your password by email.
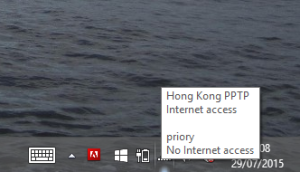 8. Click connect. Your computer will try to connect. You’ll be able to tell that you are connected to a VPN by hovering over the network icon in the system tray.
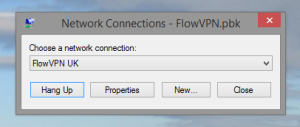 9. To disconnect, open your .pbk file again and click ‘Hang up’ then ‘Yes’.